
- 引言
- KFP v2 安装与基本概念
- 定义组件
- 编写流水线
- 高级模式
- CI/CD 集成
- 编译之后到底产出什么
- 提交执行并读懂一次 Run
- 从头到尾完整跑一次
- 组件比你想的要孤立得多
- 读一个失败 Run 的顺序
- 缓存默认是开着的
- 控制流和平台功能改名了
- 什么时候不该用 KFP
- 结语
- 参考资料
- 测验
引言
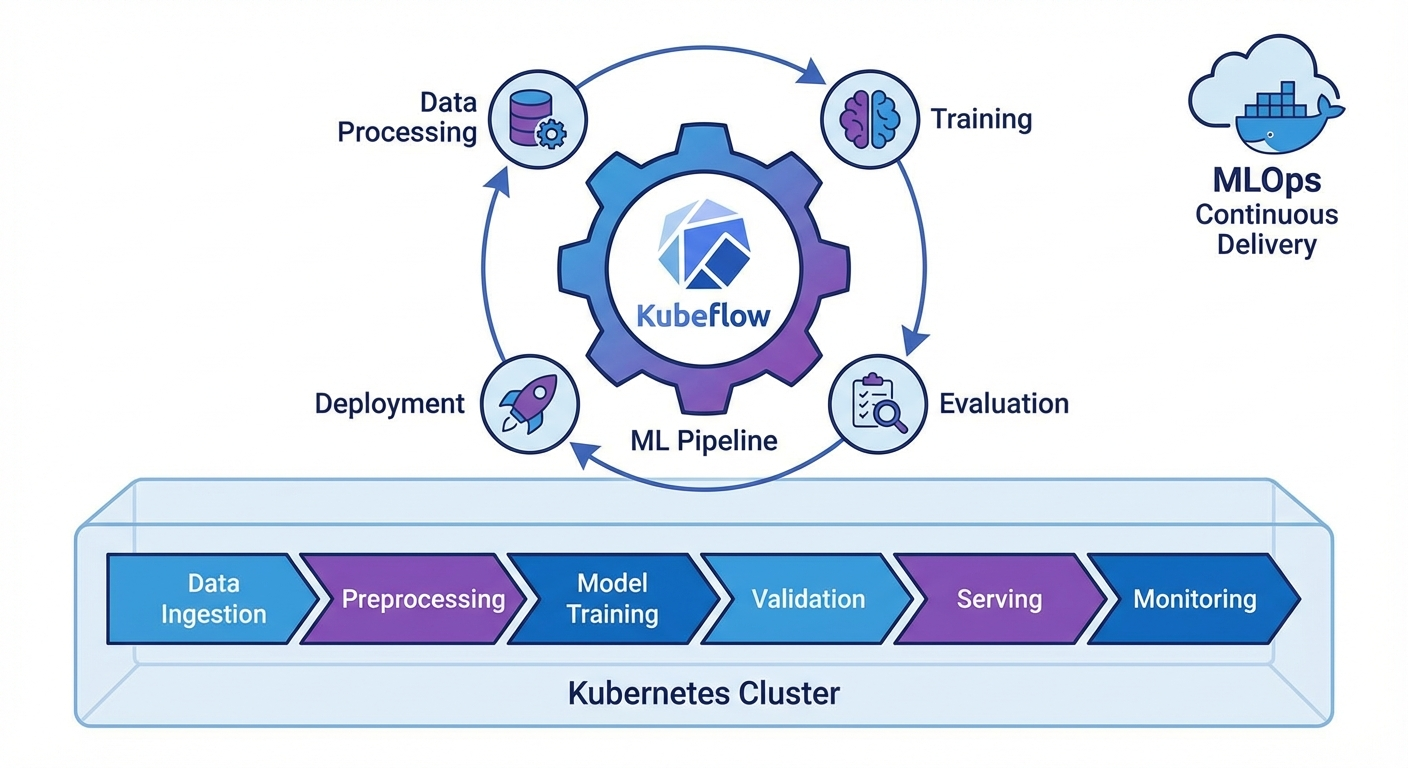
在把 ML 模型从实验搬到生产环境的过程中,可复现性、自动化、版本管理是必不可少的。Kubeflow Pipelines(KFP)v2 是一个在 Kubernetes 上定义和运行 ML 工作流的框架,仅凭 Python 装饰器就能组装出流水线。
本文将介绍 KFP v2 SDK 的核心功能,以及如何搭建实战流水线。
KFP v2 安装与基本概念
安装
pip install kfp==2.7.0

# 安装 Kubeflow Pipelines 后端(Kubernetes)
kubectl apply -k "github.com/kubeflow/pipelines/manifests/kustomize/env/platform-agnostic?ref=2.2.0"

# 端口转发
kubectl port-forward svc/ml-pipeline-ui -n kubeflow 8080:80
核心概念
# 1. Component:流水线中的一个工作单元(Python 函数)
# 2. Pipeline:由 Component 组成的 DAG(有向无环图)
# 3. Artifact:输入/输出数据(Dataset、Model、Metrics 等)
# 4. Run:流水线的一次执行
# 5. Experiment:多个 Run 的逻辑分组
定义组件
轻量级 Python 组件
from kfp import dsl
from kfp.dsl import (
    Dataset, Input, Output, Model, Metrics,
    ClassificationMetrics, component
)


@dsl.component(
    base_image="python:3.11-slim",
    packages_to_install=["pandas==2.1.4", "scikit-learn==1.4.0"]
)
def load_data(
    dataset_url: str,
    output_dataset: Output[Dataset]
):
    """数据加载组件"""
    import pandas as pd

    df = pd.read_csv(dataset_url)
    print(f"Loaded {len(df)} rows")

    # 保存到输出 artifact
    df.to_csv(output_dataset.path, index=False)
    output_dataset.metadata["num_rows"] = len(df)
    output_dataset.metadata["num_columns"] = len(df.columns)


@dsl.component(
    base_image="python:3.11-slim",
    packages_to_install=["pandas==2.1.4", "scikit-learn==1.4.0"]
)
def preprocess_data(
    input_dataset: Input[Dataset],
    train_dataset: Output[Dataset],
    test_dataset: Output[Dataset],
    test_size: float = 0.2
):
    """数据预处理与切分"""
    import pandas as pd
    from sklearn.model_selection import train_test_split

    df = pd.read_csv(input_dataset.path)

    # 预处理
    df = df.dropna()
    df = df.drop_duplicates()

    # 切分
    train_df, test_df = train_test_split(df, test_size=test_size, random_state=42)

    train_df.to_csv(train_dataset.path, index=False)
    test_df.to_csv(test_dataset.path, index=False)

    train_dataset.metadata["num_rows"] = len(train_df)
    test_dataset.metadata["num_rows"] = len(test_df)


@dsl.component(
    base_image="python:3.11-slim",
    packages_to_install=[
        "pandas==2.1.4", "scikit-learn==1.4.0",
        "joblib==1.3.2", "xgboost==2.0.3"
    ]
)
def train_model(
    train_dataset: Input[Dataset],
    model_output: Output[Model],
    metrics_output: Output[Metrics],
    n_estimators: int = 100,
    max_depth: int = 6,
    learning_rate: float = 0.1
):
    """模型训练"""
    import pandas as pd
    import joblib
    from xgboost import XGBClassifier
    from sklearn.model_selection import cross_val_score

    df = pd.read_csv(train_dataset.path)
    X = df.drop("target", axis=1)
    y = df["target"]

    # 训练
    model = XGBClassifier(
        n_estimators=n_estimators,
        max_depth=max_depth,
        learning_rate=learning_rate,
        random_state=42
    )
    model.fit(X, y)

    # 交叉验证
    cv_scores = cross_val_score(model, X, y, cv=5, scoring="accuracy")

    # 保存模型
    joblib.dump(model, model_output.path)
    model_output.metadata["framework"] = "xgboost"
    model_output.metadata["n_estimators"] = n_estimators

    # 记录指标
    metrics_output.log_metric("cv_accuracy_mean", float(cv_scores.mean()))
    metrics_output.log_metric("cv_accuracy_std", float(cv_scores.std()))
    metrics_output.log_metric("n_estimators", n_estimators)


@dsl.component(
    base_image="python:3.11-slim",
    packages_to_install=[
        "pandas==2.1.4", "scikit-learn==1.4.0",
        "joblib==1.3.2", "xgboost==2.0.3"
    ]
)
def evaluate_model(
    test_dataset: Input[Dataset],
    model_input: Input[Model],
    metrics_output: Output[ClassificationMetrics],
    eval_metrics: Output[Metrics]
) -> float:
    """模型评估"""
    import pandas as pd
    import joblib
    from sklearn.metrics import accuracy_score, classification_report

    df = pd.read_csv(test_dataset.path)
    X = df.drop("target", axis=1)
    y = df["target"]

    model = joblib.load(model_input.path)
    y_pred = model.predict(X)
    y_prob = model.predict_proba(X)

    accuracy = accuracy_score(y, y_pred)

    # 分类指标(混淆矩阵可视化)
    metrics_output.log_confusion_matrix(
        categories=["Class 0", "Class 1"],
        matrix=[[int(sum((y == 0) & (y_pred == 0))), int(sum((y == 0) & (y_pred == 1)))],
                [int(sum((y == 1) & (y_pred == 0))), int(sum((y == 1) & (y_pred == 1)))]]
    )

    eval_metrics.log_metric("test_accuracy", accuracy)

    return accuracy
自定义 Docker 镜像组件
@dsl.component(
    base_image="pytorch/pytorch:2.1.0-cuda12.1-cudnn8-runtime",
    packages_to_install=["transformers==4.37.0", "datasets==2.16.0"]
)
def finetune_llm(
    model_name: str,
    train_dataset: Input[Dataset],
    output_model: Output[Model],
    epochs: int = 3,
    batch_size: int = 8
):
    """LLM 微调(使用 GPU)"""
    from transformers import AutoModelForSequenceClassification, Trainer
    # ... 训练代码
    pass
编写流水线
基本流水线
@dsl.pipeline(
    name="ML Training Pipeline",
    description="数据加载 → 预处理 → 训练 → 评估流水线"
)
def ml_training_pipeline(
    dataset_url: str = "https://example.com/data.csv",
    test_size: float = 0.2,
    n_estimators: int = 100,
    max_depth: int = 6,
    learning_rate: float = 0.1,
    accuracy_threshold: float = 0.85
):
    # Step 1: 加载数据
    load_task = load_data(dataset_url=dataset_url)

    # Step 2: 预处理(load_task 完成后执行)
    preprocess_task = preprocess_data(
        input_dataset=load_task.outputs["output_dataset"],
        test_size=test_size
    )

    # Step 3: 模型训练
    train_task = train_model(
        train_dataset=preprocess_task.outputs["train_dataset"],
        n_estimators=n_estimators,
        max_depth=max_depth,
        learning_rate=learning_rate
    )
    # 设置资源限制
    train_task.set_cpu_limit("4")
    train_task.set_memory_limit("8Gi")

    # Step 4: 评估
    eval_task = evaluate_model(
        test_dataset=preprocess_task.outputs["test_dataset"],
        model_input=train_task.outputs["model_output"]
    )

    # Step 5: 条件部署
    with dsl.If(eval_task.output >= accuracy_threshold):
        deploy_task = deploy_model(
            model_input=train_task.outputs["model_output"],
            accuracy=eval_task.output
        )


@dsl.component(base_image="python:3.11-slim")
def deploy_model(
    model_input: Input[Model],
    accuracy: float
):
    """模型部署(满足条件时)"""
    print(f"Deploying model with accuracy: {accuracy:.4f}")
    print(f"Model path: {model_input.path}")
    # 实际部署逻辑(K8s Serving、BentoML 等)
编译并运行流水线
from kfp import compiler
from kfp.client import Client

# 1. 编译为 YAML
compiler.Compiler().compile(
    pipeline_func=ml_training_pipeline,
    package_path="ml_pipeline.yaml"
)

# 2. 提交到 KFP 服务器
client = Client(host="http://localhost:8080")

# 创建 Experiment
experiment = client.create_experiment(name="ml-experiments")

# 执行 Run
run = client.create_run_from_pipeline_func(
    ml_training_pipeline,
    experiment_name="ml-experiments",
    run_name="training-run-001",
    arguments={
        "dataset_url": "gs://my-bucket/data.csv",
        "n_estimators": 200,
        "max_depth": 8,
        "accuracy_threshold": 0.90
    }
)

print(f"Run ID: {run.run_id}")
print(f"Run URL: http://localhost:8080/#/runs/details/{run.run_id}")
定期执行(Recurring Run)
# 每天凌晨 2 点执行
client.create_recurring_run(
    experiment_id=experiment.experiment_id,
    job_name="daily-retraining",
    pipeline_func=ml_training_pipeline,
    cron_expression="0 2 * * *",
    max_concurrency=1,
    arguments={
        "dataset_url": "gs://my-bucket/latest-data.csv",
        "accuracy_threshold": 0.85
    }
)
高级模式
并行执行(ParallelFor)
@dsl.pipeline(name="Hyperparameter Search")
def hp_search_pipeline():
    # 定义超参数组合
    hp_configs = [
        {"n_estimators": 100, "max_depth": 4, "lr": 0.1},
        {"n_estimators": 200, "max_depth": 6, "lr": 0.05},
        {"n_estimators": 300, "max_depth": 8, "lr": 0.01},
    ]

    # 并行训练
    with dsl.ParallelFor(hp_configs) as config:
        train_task = train_model(
            train_dataset=load_task.outputs["output_dataset"],
            n_estimators=config.n_estimators,
            max_depth=config.max_depth,
            learning_rate=config.lr
        )
缓存
# 在组件级别禁用缓存
load_task = load_data(dataset_url=dataset_url)
load_task.set_caching_options(False)  # 始终重新执行

# 在流水线级别设置缓存
run = client.create_run_from_pipeline_func(
    ml_training_pipeline,
    enable_caching=True  # 输入相同时使用缓存
)
挂载卷
@dsl.component(base_image="python:3.11-slim")
def process_large_data(output_data: Output[Dataset]):
    """处理大规模数据"""
    pass

# 挂载 PVC
process_task = process_large_data()
process_task.add_pvolumes({
    "/mnt/data": dsl.PipelineVolume(pvc="data-pvc")
})
CI/CD 集成
GitHub Actions + KFP
# .github/workflows/ml-pipeline.yml
name: ML Pipeline CI/CD

on:
  push:
    branches: [main]
    paths:
      - 'pipelines/**'
      - 'components/**'

jobs:
  deploy-pipeline:
    runs-on: ubuntu-latest
    steps:
      - uses: actions/checkout@v4

      - name: Set up Python
        uses: actions/setup-python@v5
        with:
          python-version: '3.11'

      - name: Install dependencies
        run: pip install kfp==2.7.0

      - name: Compile pipeline
        run: python pipelines/compile.py

      - name: Upload and run pipeline
        env:
          KFP_HOST: ${{ secrets.KFP_HOST }}
        run: |
          python -c "
          from kfp.client import Client
          client = Client(host='$KFP_HOST')
          client.upload_pipeline(
            pipeline_package_path='ml_pipeline.yaml',
            pipeline_name='ml-training-v2',
            description='Automated ML training pipeline'
          )
          "
编译之后到底产出什么
先说版本。从本节开始,API 以 kfp SDK 2.17.0 为准,并与 kfp-kubernetes 2.17.0 和 kfp-server-api 2.17.0 搭配使用。它需要 Python 3.9 以上,和上面安装代码块里的 2.7.0 并不相同。如果你找到的示例照抄过来跑不通,十有八九是 SDK 的版本差异。
API 参考把 Compiler 描述为「把用 KFP SDK DSL 编写的流水线编译成 YAML 流水线定义」,并明确把 package_path 定为「输出 YAML 文件的路径」。v2 的编译产物永远只有一个 YAML 文件。
from kfp import compiler

compiler.Compiler().compile(
    pipeline_func=ml_training_pipeline,
    package_path="ml_pipeline.yaml",  # 照搬文档的说法:「输出 YAML 文件的路径」
    pipeline_name="ml-training",
    pipeline_display_name="ML Training Pipeline",
    pipeline_parameters={"n_estimators": 200},
    type_check=True,
)
# 其余参数:kubernetes_manifest_options, kubernetes_manifest_format
# 注意:kfp_package_path 是 @dsl.component 的参数,不是 compile() 的
编译既不碰集群也不碰后端。所以它应该是 CI 里最先跑的那道检查。任务接错了或者类型对不上,都会在这里被拦下。想让 CI 步骤只有一行,用 CLI 更方便。
kfp dsl compile --py my_pipeline.py --output my_pipeline.yaml
kfp_package_path 长得像一个编译选项,很多人在这里绕远路。像 kubernetes_manifest_options 这种光看名字说不清用途的参数,请到你正在使用的版本的文档里确认准确的 API。
提交执行并读懂一次 Run
往上提交有两条路径。create_run_from_pipeline_func 接收流水线函数并在内部完成编译,create_run_from_pipeline_package 则接收你事先做好的 YAML。两者的参数集合是一样的。实际工作中推荐后者:CI 里产出的同一个 YAML,可以原样提交到预发和生产。
from kfp.client import Client

client = Client(host="http://localhost:8080", namespace="kubeflow")
experiment = client.create_experiment(name="ml-experiments")

# 两个函数共用的参数:arguments, run_name, experiment_name, namespace,
#   pipeline_root, enable_caching, cache_key, service_account, experiment_id
run = client.create_run_from_pipeline_package(
    pipeline_file="ml_pipeline.yaml",
    arguments={"n_estimators": 200, "accuracy_threshold": 0.90},
    run_name="training-run-001",
    experiment_id=experiment.experiment_id,
    enable_caching=True,
)

# 在 CI 里必须在这里阻塞,成功与否才能通过退出码传出去
client.wait_for_run_completion(run.run_id, timeout=3600, sleep_duration=5)

# 注册到目录并升版本
client.upload_pipeline("ml_pipeline.yaml", pipeline_name="ml-training-v2")
client.upload_pipeline_version("ml_pipeline.yaml", "v3", pipeline_name="ml-training-v2")

# 定期执行指向的是包或已注册的流水线,而不是函数
client.create_recurring_run(
    experiment_id=experiment.experiment_id,
    job_name="daily-retraining",
    pipeline_package_path="ml_pipeline.yaml",  # 或者 pipeline_id / version_id
    cron_expression="0 2 * * *",
    max_concurrency=1,
    no_catchup=True,      # 停机后恢复时,不把积压的调度一次性补跑完
    params={"accuracy_threshold": 0.85},
)
Client 的默认命名空间是 kubeflow,而 list_runs 的 page_size 默认是 10,所以只会返回十条。
定期执行有个坑。上面那段示例给 create_recurring_run 传了 pipeline_func,但确认过的签名里并没有这个参数。它必须指向编译好的包或者已注册流水线的 ID,而不是函数。
Run 一旦开始,图里的一个节点就是一个任务,一个任务就是一个 Pod。点开节点能看到日志、输入输出 Artifact,以及是否命中缓存。Pod 的命名规则和标签会随部署方式不同,请到你所用部署方式的文档里确认。
从头到尾完整跑一次
上面的示例需要外部 CSV 和 XGBoost,很难照原样跑起来。这里我们做一个复制过去就能直接提交的最小流水线。目的只有一个:把从编译到提交、再到 Artifact 出现在 UI 上的这条路径完整走一遍。
from typing import NamedTuple

from kfp import compiler, dsl
from kfp.client import Client


@dsl.component(base_image="python:3.11")
def make_split(n_rows: int, ratio: float) -> NamedTuple('outputs', train=int, test=int):
    from typing import NamedTuple

    outputs = NamedTuple('outputs', train=int, test=int)
    n_test = int(n_rows * ratio)
    return outputs(n_rows - n_test, n_test)


@dsl.component(base_image="python:3.11", packages_to_install=["scikit-learn==1.4.0"])
def fit_and_score(
    train_rows: int,
    model: dsl.Output[dsl.Model],
    metrics: dsl.Output[dsl.Metrics],
):
    import json

    from sklearn.dummy import DummyClassifier

    X = [[0], [1]] * train_rows
    y = [0, 1] * train_rows

    clf = DummyClassifier(strategy="most_frequent")
    clf.fit(X, y)
    accuracy = float(clf.score(X, y))

    with open(model.path, "w") as f:
        json.dump({"strategy": "most_frequent"}, f)
    model.metadata["framework"] = "sklearn"
    metrics.log_metric("accuracy", accuracy)


@dsl.pipeline(name="smoke-pipeline", description="compile to submit smoke test")
def smoke_pipeline(n_rows: int = 1000, ratio: float = 0.2):
    split = make_split(n_rows=n_rows, ratio=ratio)

    fit = fit_and_score(train_rows=split.outputs["train"])
    fit.set_memory_request("512Mi")
    fit.set_memory_limit("1Gi")
    fit.set_retry(num_retries=2)


compiler.Compiler().compile(smoke_pipeline, package_path="smoke_pipeline.yaml")

client = Client(host="http://localhost:8080")
run = client.create_run_from_pipeline_package(
    "smoke_pipeline.yaml",
    arguments={"n_rows": 1000},
    run_name="smoke-001",
    experiment_name="smoke",
)
print(run.run_id)
client.wait_for_run_completion(run.run_id, timeout=900)

# 参数映射:str -> string, int/float -> number, bool -> boolean,
#           list/dict -> object
# Artifact 类型:dsl.Artifact(system.Artifact), Dataset, Model, Metrics,
#   ClassificationMetrics, SlicedClassificationMetrics, HTML, Markdown
#   共有属性 .name .uri .path .metadata / Model 额外多出 .framework
# Metrics.log_metric(metric, value)
# ClassificationMetrics.log_roc_data_point(fpr, tpr, threshold), log_roc_curve(),
#   set_confusion_matrix_categories(), log_confusion_matrix_row(),
#   log_confusion_matrix_cell(), log_confusion_matrix(categories, matrix)
# dsl.InputPath / dsl.OutputPath 主要用于 Container Components,
#   Python Components 用返回值的类型注解做同样的事
跑起来大致是这个样子。字符串和 UI 的布局会随后端版本变化,所以只看每一项在不在即可。
1) 编译产物
   smoke_pipeline.yaml          <- 只有这一个文件

2) 提交之后的标准输出
   Run ID 以一行 UUID 打印出来

3) UI 中 Run 详情页的图
   make_split       Succeeded
   fit_and_score    Succeeded
     Metrics   标签页 : accuracy = 0.5
     Artifacts 标签页 : model (system.Model), metadata.framework = sklearn

4) 用同样的参数再提交一次
   make_split       Succeeded  (显示命中缓存)
   fit_and_score    Succeeded  (显示命中缓存)
   -> 执行时间缩短到几秒
验收一个新集群时,只看两件事就够了:第一次执行是否成功,第二次是否变快。两者合起来就是后端和 Artifact 存储已经接通的信号。
有多个输出的组件用 NamedTuple 声明,在下一个任务里通过 task.outputs['<output-key>'] 取出。在函数内部重新定义 NamedTuple 这段看着别扭的代码不是失误而是必需,原因下一节解释。
小的值会被序列化为参数,模型和数据集这类大的东西则成为 Artifact。按类型的映射和方法名都写在上面代码末尾的注释里。只挑一个说:记录 ROC 点的方法叫 log_roc_data_point,示例里时不时出现的 log_roc_reading 并不存在。
组件比你想的要孤立得多
这是最常踩的坑。文档为 Python 组件明确写了两条约束:函数的输入和输出必须带有有效的 KFP 类型注解,而且函数不能引用任何在其函数体之外定义的符号。
真正要命的是第二条。装饰器会把函数源码摘出来,放进容器里单独执行,所以模块顶部的 import、文件里某处的常量,在容器内都不存在。
# 不工作 - 引用了函数体外的符号
import pandas as pd

TARGET_COLUMN = "label"


@dsl.component(base_image="python:3.11")
def bad_component(data: dsl.Input[dsl.Dataset]) -> int:
    df = pd.read_csv(data.path)                # NameError: name 'pd' is not defined
    return int(df[TARGET_COLUMN].nunique())    # NameError: name 'TARGET_COLUMN' ...


# 能工作 - 所有符号都在函数体内
@dsl.component(base_image="python:3.11", packages_to_install=["pandas==2.1.4"])
def good_component(data: dsl.Input[dsl.Dataset], target_column: str = "label") -> int:
    import pandas as pd

    df = pd.read_csv(data.path)
    return int(df[target_column].nunique())
难受的地方在于编译能过。YAML 生成了,Run 也起来了,然后在集群上以 NameError 挂掉。评审规则只要一条:组件函数的第一行应该是 import,函数体里出现签名中没有的名字就打回。
packages_to_install 也有代价。文档说明这个列表会在任务每次执行时安装一遍。跑一百次,pip install 也跑一百次。替代方案是在构建期就把依赖烤进镜像的 Containerized Python Components。
# 只构建镜像,不推送 (本地确认用)
kfp component build src/ --component-filepattern my_component.py --no-push-image

# 一直推到镜像仓库 (CI 里用的形式)
kfp component build src/ --component-filepattern my_component.py --push-image
按 Containerized Python Components 文档,base_image 的默认值是 python:3.11。不过 Lightweight Python Components 页面上还写着 python:3.7,两个页面互相打架,所以永远显式写出来。在离线内网环境里,还需要一起用上 pip_index_urls、pip_trusted_hosts、install_kfp_package 和 use_venv。
读一个失败 Run 的顺序
Run 变红之后不要在 UI 上乱翻,按顺序来:找到失败的节点,只读日志最后三十行,然后分清这是 Python 异常还是 Pod 根本没起来。
- NameError 或 ModuleNotFoundError — 要么违反了隔离规则,要么缺包。编译通过在这里没有任何意义。
- 下一个任务找不到输入 — 你直接往
.uri里写了。按文档的说法,.uri是 Artifact 在存储中实际存在的位置,而.path提供便捷的本地文件系统访问。代码要写到.path。 - Pod 卡在 Pending 不动 — request 是调度依据,limit 是上限。只把 request 调大就会永远 Pending,这在 Kubernetes 事件里能看到。
- GPU 任务起来了却没有 GPU — 看看
set_accelerator_type和set_accelerator_limit是不是都设了。set_gpu_limit在当前参考文档里已经没有了。 - 拉不到镜像 — 这是 Kubernetes 的通用行为而不是 KFP,去看集群侧的文档。
- 瞬间就结束了 — 那不是失败,是命中了缓存。
重试是 set_retry(num_retries, backoff_duration=None),上游失败也要继续做的收尾工作是 ignore_upstream_failure()。想对整体成败做出反应,就用 dsl.ExitHandler 搭配 dsl.PipelineTaskFinalStatus,其中 state 是 SUCCEEDED、FAILED、CANCELLED 三者之一。
@dsl.component(base_image="python:3.11")
def notify(status: dsl.PipelineTaskFinalStatus):
    print("state:", status.state)
    if status.state == "FAILED":
        print("pipeline failed - send alert here")


@dsl.pipeline(name="pipeline-with-exit-handler")
def pipeline_with_exit_handler(n_rows: int = 1000):
    with dsl.ExitHandler(exit_task=notify()):
        split = make_split(n_rows=n_rows, ratio=0.2)

        fit = fit_and_score(train_rows=split.outputs["train"])
        fit.set_retry(num_retries=2)
夜间重训练悄无声息地失败,就是靠这个挡住的。backoff_duration 接受的值是什么格式没能确认,请到你正在使用的版本的文档里确认准确的 API。
缓存默认是开着的
文档明确写着,对所有组件而言缓存默认启用。你要做的不是打开它,它已经开着了,你只是在需要的时候把它关掉。
设置分三层。任务级是 set_caching_options(False),Run 级是 enable_caching,而 Run 级会覆盖任务级。如果组件上已经关了却还是命中,去看 Run 的参数。
# 1) 任务级 - 只有这个任务总是重新执行
load_task = load_data(dataset_url=dataset_url)
load_task.set_caching_options(False)

# 2) Run 级 - 覆盖任务级的设置
run = client.create_run_from_pipeline_func(
    ml_training_pipeline,
    arguments={"dataset_url": "gs://my-bucket/data.csv"},
    enable_caching=False,
)
第三层是全局。编译标志或环境变量可以把默认值本身关掉,而环境变量必须在导入组件之前设置才会生效。
# 用编译标志关掉默认值
kfp dsl compile --py my_pipeline.py --output my_pipeline.yaml \
  --disable-execution-caching-by-default

# 或者用环境变量 (必须在 import 组件之前设置)
export KFP_DISABLE_EXECUTION_CACHING_BY_DEFAULT=true
python my_pipeline.py
缓存命中时,UI 上会出现一个绿色的云朵箭头图标。
从这里开始是推断而不是文档。缓存键由哪些部分组成没有文档说明,所以无法断言。不过从「组件和输入没变就会拿回上一次的输出」这个观察来看,让人意外的情况大多是改变的东西落在缓存键之外。外部存储桶里的数据被悄悄更新,或者 latest 这类浮动标签背后的镜像被换掉,都是典型例子。有疑问时,只把那个任务的缓存关掉再对比。
控制流和平台功能改名了
搬旧代码时第一个要确认的名字是 dsl.Condition。文档明确写着它已被功能等价的 dsl.If 取代并废弃。上面的流水线已经用的是 dsl.If,但公司仓库里 v2 早期的代码大概还留着它。
分支由 dsl.If、dsl.Elif、dsl.Else 组成一个整体,而当各分支要把不同任务的输出汇成一个时用 dsl.OneOf,这时必须存在 dsl.Else 分支。并行执行里最容易漏掉的参数,是 dsl.ParallelFor(items, name=None, parallelism=None) 的 parallelism。直接展开的话,有多少组合就会一次起多少个 Pod,集群一小就全部卡在 Pending。要汇总扇出的结果时用 dsl.Collected。
@dsl.pipeline(name="control-flow-example")
def control_flow_example(threshold: float = 0.85):
    # train_with_epochs, max_accuracy, promote_model, stage_model,
    # report_failure 假定都是你自己定义的组件

    # 用 parallelism 限制同时起来的 Pod 数量
    with dsl.ParallelFor(items=[1, 5, 10, 25], parallelism=2) as epochs:
        train_task = train_with_epochs(epochs=epochs)

    # 把扇出的结果汇成一个
    best = max_accuracy(models=dsl.Collected(train_task.outputs["model"]))

    with dsl.If(best.output >= threshold):
        promote_model(score=best.output)
    with dsl.Elif(best.output >= 0.70):
        stage_model(score=best.output)
    with dsl.Else():
        report_failure(score=best.output)

# PipelineTask 已确认的方法 (全部可以链式调用)
#   set_cpu_request, set_cpu_limit, set_memory_request, set_memory_limit,
#   set_accelerator_type, set_accelerator_limit, set_caching_options,
#   set_retry, set_env_variable, ignore_upstream_failure, after
#   set_gpu_limit 在当前 API 参考文档里已经没有
卷是单独的包。上面卷挂载示例里的 add_pvolumes 和 dsl.PipelineVolume 是 KFP v1 时代的写法,v2 里已确认的路径是用 pip install kfp[kubernetes] 安装的 kfp-kubernetes。
from kfp import dsl, kubernetes


@dsl.pipeline(name="pvc-example")
def pvc_example():
    pvc1 = kubernetes.CreatePVC(
        pvc_name_suffix='-my-pvc',
        access_modes=['ReadWriteMany'],
        size='5Gi',
        storage_class_name='standard',
    )

    task1 = producer()
    kubernetes.mount_pvc(task1, pvc_name=pvc1.outputs['name'], mount_path='/data')

    task2 = consumer().after(task1)
    kubernetes.mount_pvc(task2, pvc_name=pvc1.outputs['name'], mount_path='/data')

    # 连清理也在流水线内部完成
    kubernetes.DeletePVC(pvc_name=pvc1.outputs['name']).after(task2)


# 同一个包里已确认的其他功能
#   use_secret_as_env, use_secret_as_volume, use_config_map_as_env,
#   use_config_map_as_volume, add_ephemeral_volume, add_pod_label,
#   add_pod_annotation, use_field_path_as_env, set_timeout,
#   set_image_pull_policy, set_security_context, set_image_pull_secrets
节点选择、规避 taint 这些在 GPU 集群上经常需要的功能,其函数名没能确认,请到你正在使用的版本的文档里确认准确的 API。
什么时候不该用 KFP
KFP 不是一个轻量工具。跑一条流水线,需要 Kubernetes 集群、KFP 后端和对象存储全都活着。把它装到不需要这份可复现性和血缘追踪的活儿上,剩下的就只有成本。
- 一个 Python 脚本就能搞定的事 — 一旦拆成组件,各阶段之间的数据就要序列化并往返存储。几秒钟的作业,开销比作业本身还大。
- 只是在固定时刻重复同一件事 — 如果根本用不上血缘,cron 或 Kubernetes CronJob 就够了。
- 身边没有人能读懂 Kubernetes — KFP 的失败大多来自 Kubernetes。没有人能读集群,调试就成了算命。
- 团队已经在别的编排器上安顿下来 — 从既有工具里调用训练作业通常更便宜。
- 还处在探索阶段 — 每次都要构建镜像或者等 pip install 的那一刻,迭代速度就垮了。
反过来,KFP 真正创造价值的地方既窄又清楚:多个人跑同一份训练却得到不同结果的时候,以及需要回溯三个月前的模型是用什么数据做出来的时候。
结语
Kubeflow Pipelines v2 核心要点:
- @dsl.component:将 Python 函数转换为容器化的组件
- @dsl.pipeline:把组件连接成 DAG
- Artifact 系统:用 Dataset、Model、Metrics 类型管理输入/输出
- 条件/循环:用 dsl.If、dsl.ParallelFor 构建动态流水线
- 缓存:相同输入时跳过重新执行,节省成本
真正吃掉时间的并不是这五条,而是隔离规则和默认开启的缓存。
参考资料
同一件事在不同页面上有时写法不一样,遇到这种情况,readthedocs 那边更接近真实的签名。
- dsl - 2026-08-16 确认。
- compiler - 2026-08-16 确认。
- client - 2026-08-16 确认。
- Containerized Python Components - 2026-08-16 确认。
- Artifacts - 2026-08-16 确认。
- Control flow - 2026-08-16 确认。
- Caching - 2026-08-16 确认。
- Platform-specific features - 2026-08-16 确认。
测验(6题)
Q1. 在 KFP v2 中,用于定义组件的装饰器是什么? @dsl.component
Q2. Output[Dataset] 和 Output[Model] 有什么区别? 用类型提示区分 Artifact 的种类。Dataset 是数据 Artifact,Model 是训练完成的模型 Artifact。
Q3. 如何在流水线中实现条件执行? 使用 dsl.If 上下文管理器(例如 with dsl.If(accuracy >= threshold))
Q4. 在启用缓存的状态下,用相同的输入执行会怎样? 复用之前的执行结果,跳过该组件
Q5. ParallelFor 的用途是什么? 用不同的参数并行执行同一个组件(例如超参数搜索)
Q6. 从 KFP v1 迁移到 v2 时,最大的变化是什么? 用 @dsl.component 装饰器取代 ContainerOp,并引入了 Artifact 类型系统
测验
Q1:《Kubeflow Pipelines v2 实战指南 — 用 KFP SDK 构建 ML 流水线》一文的主要内容是什么?
一份使用 Kubeflow Pipelines v2 的 KFP SDK 构建 ML 流水线的实战指南。以代码为中心,涵盖组件定义、流水线编写、Artifact 管理直至 Kubernetes 部署。
Q2:KFP v2 安装与基本概念部分的关键步骤有哪些?
安装 核心概念
Q3:请说明「定义组件」部分的核心概念。
轻量级 Python 组件 自定义 Docker 镜像组件
Q4:编写流水线部分的关键要点有哪些?
基本流水线 编译并运行流水线 定期执行(Recurring Run)
Q5:高级模式是如何运作的?
并行执行(ParallelFor) 缓存 挂载卷